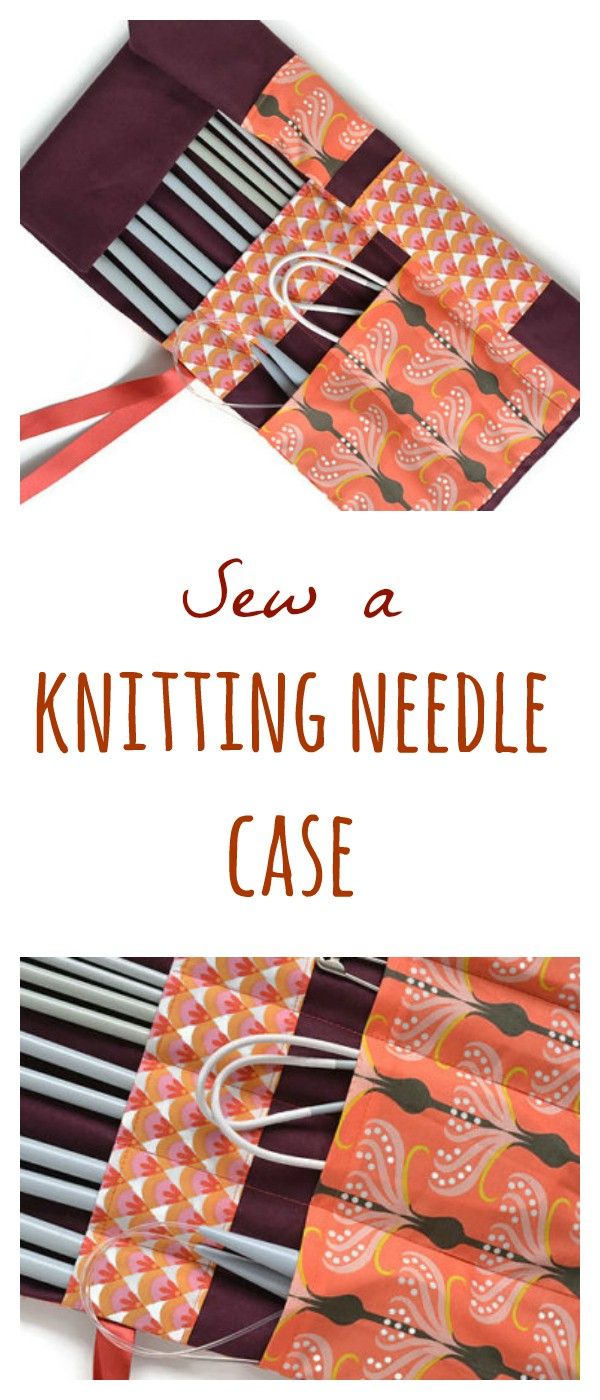
Knitted Needle Holder Knitting Pattern: The Ultimate Guide to Making Your Own
If you’ve been knitting for any length of time, you already know the struggle. Needles everywhere. Slipping out of project bags, rolling under the sofa, disappearing into the mysterious void that also swallows single socks and TV remotes. A good needle holder doesn’t just solve a practical problem — it becomes one of those small, satisfying tools that makes your entire crafting life feel more organized and intentional.
The good news is that you can knit one yourself, and the pattern is well within reach for anyone who has moved past the absolute beginner stage. This guide walks you through everything: the materials you’ll need, a full knitting pattern for a roll-up needle holder, tips for customizing it to suit your collection, and advice on how to download and save patterns so you always have them on hand when inspiration strikes.
Whether you’re looking for a knitted needle holder knitting pattern download to keep for yourself or to gift to a fellow knitter, you’ve come to the right place.
Why Knit Your Own Needle Holder?
Before we dive into the pattern itself, it’s worth taking a moment to appreciate why a handmade needle holder is often better than anything you can buy.
First, there’s the fit. Commercial needle cases are designed for general use, which means they rarely accommodate your specific collection perfectly. Maybe you have an unusual assortment of sizes, or you favor a particular type of needle — circular, double-pointed, interchangeable — that most cases don’t handle well. When you knit your own holder, you decide how many pockets to include, how deep to make them, and how wide each slot needs to be.
Second, there’s the customization. You choose the yarn, which means you choose the color, the texture, and the weight. You can match it to your favorite project bag, coordinate with your knitting aesthetic, or make it as a gift in someone’s favorite color.
Third — and this is the part many knitters don’t fully appreciate until they try it — making a tool for knitting while knitting is genuinely satisfying. There’s something deeply pleasing about the circularity of it. Your needles live in a home that was itself made with needles.
Materials You’ll Need
To make a standard roll-up knitted needle holder that fits straight needles ranging from US size 2 to US size 15 (approximately 2.75mm to 10mm), you’ll need the following:
Yarn: Approximately 200–250 yards of a worsted weight yarn in your main color (MC). Choose something relatively sturdy — cotton or a cotton-blend works beautifully because it has little stretch and holds structure well. Wool is another excellent choice. Avoid anything too soft or slippery, as the pockets need to grip the needles gently.
Contrast Color (optional): About 50 yards if you want to add a contrasting color for the pocket row or a decorative stripe.
Needles: US size 7 (4.5mm) straight or circular needles, or whatever size achieves the gauge listed below.
Additional supplies: A tapestry needle for seaming, a length of ribbon or a piece of I-cord approximately 24 inches long for the tie closure, scissors, and blocking pins or a foam mat if you like to wet-block your finished pieces.
Gauge: 18 stitches and 26 rows = 4 inches in stockinette stitch, after blocking. Gauge is not critical for this project, but if your gauge is significantly different from this, your finished dimensions will vary. The pattern notes below will help you adjust if needed.
Finished dimensions (approximate): 14 inches wide by 12 inches tall when laid flat and unrolled.
Pattern Notes and Abbreviations
Before casting on, take a few minutes to read through the full pattern. This is always good practice, and it’s especially helpful here because the construction of a roll-up needle holder involves a bit of spatial thinking — you’re essentially making a flat rectangle with pockets sewn onto one face.
Here are the abbreviations used throughout this pattern:
- CO: Cast on
- BO: Bind off
- k: Knit
- p: Purl
- RS: Right side
- WS: Wrong side
- st(s): Stitch(es)
- rep: Repeat
- MC: Main color
- CC: Contrast color (optional)
- sl1: Slip 1 stitch purlwise
- pm: Place marker
- sm: Slip marker
- k2tog: Knit two stitches together (decrease)
- wyib: With yarn in back
The Pattern: Roll-Up Knitted Needle Holder
Part One: The Backing Panel
The backing panel is the foundation of your needle holder. It’s a simple, flat rectangle that provides structure and becomes the outer surface when the holder is rolled up.
CO 64 stitches using MC and your preferred cast-on method. A long-tail cast-on gives a tidy, firm edge that works particularly well here.
Row 1 (WS): Sl1 wyib, knit to end.
Row 2 (RS): Sl1 wyib, knit to end.
Repeat these two rows until the piece measures 12 inches from the cast-on edge, ending on a WS row. The slipped stitch at the beginning of every row creates a neat chain edge along both sides, which looks polished and also makes seaming easier later.
BO all stitches loosely. You want the bound-off edge to have the same elasticity as the cast-on edge, so if you tend to bind off tightly, try going up a needle size for this final row.
Set the backing panel aside.
Part Two: The Pocket Panel
The pocket panel is slightly shorter than the backing panel. It gets attached to the backing panel at the cast-on edge and along both sides, and then divided into individual pockets.
CO 64 stitches using MC (or CC if you’d like contrasting pockets).
Row 1 (WS): Sl1 wyib, knit to end.
Row 2 (RS): Sl1 wyib, k3, p to last 4 sts, k4.
Row 3 (WS): Sl1 wyib, k3, p to last 4 sts, k4.
Repeat Rows 2 and 3 until the pocket panel measures 7 inches from the cast-on edge, ending on a WS row. This gives you a panel with a stockinette center and a garter stitch border on all four sides, which helps it lie flat and gives the pockets a clean, structured look.
BO all stitches loosely.
Part Three: Assembling the Holder
Now comes the satisfying assembly stage. Lay your backing panel flat on a clean surface, right side facing down. Place the pocket panel on top of it, right side facing up, aligning the bottom (cast-on) edges. The pocket panel should be centered vertically on the backing panel, leaving approximately 2.5 inches of backing panel visible at the top (this exposed area becomes the flap that keeps needles from sliding out).
Using your tapestry needle and MC, seam the bottom edges together using a mattress stitch or a simple whipstitch. Then seam up both sides. You now have a flat rectangle with a pocket pouch across the lower portion.
Part Four: Creating the Individual Pockets
This is where the holder becomes functional. You’ll divide the pocket panel into individual slots by stitching vertical seam lines from the bottom edge upward.
For a holder with pockets wide enough to fit most straight needle sizes comfortably, you want pockets approximately 1 inch wide for smaller needles and 1.5 to 2 inches wide for larger needles. Because needle diameter increases significantly at the upper end of the size range, it makes sense to graduate your pocket widths.
A suggested layout for the 64-stitch-wide panel (approximately 14 inches), from left to right:
Create six narrow pockets (each approximately 1 inch wide) on the left side of the panel for your smaller needles (US sizes 2 through 6). Then create five wider pockets (each approximately 1.5 inches wide) on the right side for your larger needles (US sizes 7 through 15). This gives you eleven pockets in total, which covers most standard straight needle sets.
Using MC threaded on your tapestry needle, stitch a straight vertical line from the bottom seam upward through both layers of the pocket panel. Stitch up and then back down the same line twice for durability. A ruler or a couple of blocking pins can help you keep these lines straight.
Part Five: The Tie Closure
The easiest closure for a roll-up needle holder is a simple ribbon tie sewn to the center of one long edge. When the holder is rolled up around your needles, you wrap the ribbon around the outside and tie it in a bow.
If you prefer a fully knitted finish, work a three-stitch I-cord approximately 24 inches long using MC, then seam the center of the I-cord to the center of one long side edge of the backing panel.
To attach a ribbon, cut a 24-inch length of 3/8-inch grosgrain ribbon and fold it in half. Using a sharp needle and strong thread that matches either the ribbon or the yarn, stitch the folded center of the ribbon firmly to the center of one long side edge. Stitch back and forth several times so the attachment is secure — your ribbon needs to hold the weight of a full collection of needles when the holder is rolled tightly.
Part Six: Finishing
Weave in all your ends carefully. Because this project will see regular use and will be rolled and unrolled frequently, take the time to weave ends in two directions rather than just one — this prevents them from working their way loose over time.
If you’re using a plant fiber yarn like cotton, wet blocking will significantly improve the finished look. Submerge the completed holder in cool water, gently squeeze out the excess (don’t wring), roll it briefly in a towel, and then pin it flat to your blocking surface at the correct dimensions. Allow it to dry completely before loading it with needles.
Wool and wool-blend yarns benefit from wet blocking as well, though you’ll want to use cool water and very gentle handling to prevent felting.
Customizing Your Knitted Needle Holder
The basic pattern above is really a framework. Once you understand the construction, there’s enormous room to make it your own.
For circular needles: Circular needle cases require longer pockets, since you’re storing the cable along with the tips. Extend the pocket panel to 10 or 11 inches tall and consider making the pockets wider. You can also add a simple zipper across the top of the pockets to keep cables from escaping.
For double-pointed needles (DPNs): DPNs travel in sets, so you want pockets wide enough to hold a set of five together. Consider making a smaller, separate holder specifically for DPNs — a 6-inch by 8-inch version of this pattern with fewer but wider pockets works beautifully.
Adding embellishment: A simple embroidered initial on the flap, a row of seed stitch across the pocket panel’s top edge, or a colorwork stripe in a contrast color can all elevate this from a utility object to something genuinely beautiful. This also makes it a more personal gift.
Size adjustment: If you want to adjust the overall size, add or remove stitches in multiples of 2 and adjust your row count proportionally. The key ratio to preserve is that the pocket panel should be roughly 60% of the backing panel’s height, leaving a meaningful flap at the top.
How to Download and Save Knitting Patterns
If you find knitting patterns online that you love — including variations of this needle holder — there are a few best practices for saving and organizing them so they’re easy to access later.
Saving a PDF to a dedicated folder on your computer or cloud storage is the most reliable method. Many pattern platforms allow you to download a formatted PDF directly; look for a download button or a print option and choose “save as PDF” from your browser’s print dialog.
For patterns you find on blogs or in article format (like this one), a browser extension that saves web pages as PDFs works well. Alternatively, copy the text into a word processing document and save it with the pattern name and date.
If you use a knitting app like Ravelry, you can add patterns to your library, which makes it easy to access them from any device. Many knitters keep a small binder of printed patterns for their most-used designs, which means they’re accessible even without a phone or computer nearby.
Whatever system you use, the most important thing is consistency. Choose one place to store your patterns and put everything there. There’s nothing more frustrating than remembering a pattern exists but not being able to find it.
Tips for Knitting the Holder Successfully
A few things learned from knitting multiple versions of this project are worth passing along.
Tension matters more than you might expect for a project like this. Inconsistent tension produces a pocket panel that puckers or waves rather than lying flat, which makes it harder to insert and remove needles smoothly. If you tend toward uneven tension, a cotton yarn is more forgiving than wool because it has less elasticity.
Don’t skip the slipped stitches at the edges. They might seem like a small detail, but they produce edges that are far neater and more stable than a standard knit-every-edge-stitch approach. Neat edges make the seaming steps much easier.
Test the pocket size before stitching all the vertical seam lines. Once you’ve seamed the pocket panel to the backing panel, fold a piece of paper into the width you’re planning for one pocket and slide a needle into the opening. The needle should slide in and out smoothly with very slight resistance — enough to hold it in place, but not so tight that removing it feels like a struggle.
When stitching the vertical pocket dividers, keep your tension consistent. If some lines are pulled tighter than others, the pocket panel will distort.
A Note on Gifting
A knitted needle holder makes an exceptional gift for knitters at every level. Beginners appreciate having an organized home for their growing needle collection. Experienced knitters appreciate the thought and craft that goes into something handmade. And because the holder is made from their favorite materials — yarn and needles — it speaks directly to their passion in a way that a generic gift never quite manages.
Consider pairing it with a few skeins of beautiful yarn tucked into the pockets, or with a gift card to their favorite yarn shop. The presentation of a handmade object is part of the gift, so take care with the finishing, roll it neatly, and tie the ribbon with intention.
Final Thoughts
A knitted needle holder is one of those projects that knitters often put off making because it feels like a utilitarian detour from the “real” knitting — the sweaters, shawls, and accessories they had planned. But once you have one, it changes your relationship with your tools in a small but meaningful way. Your needles have a home. Your bag is tidier. Your mind is a little quieter before you begin a project because you’re not hunting for the right size.
This pattern is designed to be accessible, adaptable, and genuinely useful. Print it, save it, adjust it, make three of them. Share the link with a knitting friend. And most importantly, enjoy the process — because this little holder was made, start to finish, with the very tools it’s designed to hold.
Happy knitting.