



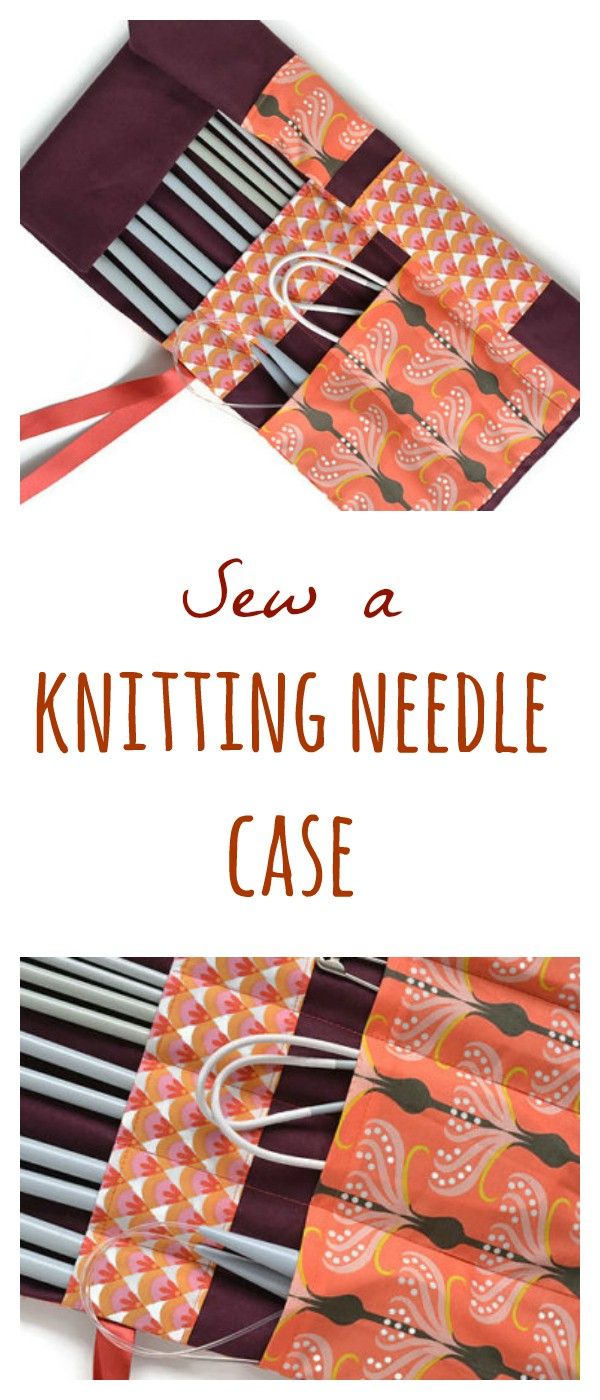
Easy Knitting Needle Case Pattern: Sew Your Own Organized Storage in an Afternoon
If you’ve ever dug through a tote bag looking for that one size 8 circular needle buried somewhere beneath yarn scraps and stitch markers, you already know the frustration. Keeping knitting needles organized is one of those small problems that quietly takes up more mental energy than it deserves. The good news is that a handmade knitting needle case is one of the most satisfying sewing projects you can tackle in a single afternoon, and once you have one, you’ll wonder how you ever managed without it.
This easy knitting needle case pattern is designed for sewists of all experience levels. Whether you’ve been sewing for twenty years or you recently bought your first machine, you can follow along, customize as you go, and end up with a functional, beautiful case that fits your needle collection perfectly. We’ll walk through everything: materials, measurements, cutting, sewing, and finishing, plus a handful of tips for making the project truly your own.
Why Make Your Own Knitting Needle Case?
Before we get into the how, it’s worth spending a moment on the why. There are plenty of needle cases available for purchase, so why sew one yourself?
The honest answer is control. Store-bought cases are built to hold a generic collection, but your collection is probably anything but generic. Maybe you have a dozen sets of interchangeable circular needles and only a handful of straights. Maybe you specialize in lace knitting and own every needle from size 0 to size 4. Maybe you mostly knit blankets and hats and your straights are all in the chunky range. When you sew your own case, you decide the number of pockets, the height of the pockets, the width of the roll, and the closure style. The case fits your life, not the other way around.
There’s also the satisfaction factor. Knitters tend to be makers at heart, and there’s something deeply pleasing about housing your handmade tools inside another handmade object. A knitting needle case also makes a wonderful gift for a knitting friend, and because you can choose your own fabric, it can be as personal and thoughtful as the time you put into it.
Finally, it’s genuinely easy. This is not a beginner-friendly project with asterisks. It is truly beginner-friendly. The construction involves straight seams, a bit of topstitching, and basic pressing. No zippers, no invisible seams, no complicated techniques required.
Materials You’ll Need
Gathering your materials before you start saves a lot of mid-project frustration. Here’s what you’ll need to make a standard roll-up knitting needle case that holds both straight needles and a small collection of circulars.
Fabric: You’ll need about half a yard each of an outer fabric and a lining fabric. A medium-weight cotton or cotton-linen blend works beautifully for the outer layer because it holds its shape and is easy to topstitch. For the lining, a quilting cotton in a coordinating print or a contrasting solid gives the interior a polished look. Avoid fabrics that are too stiff or too stretchy for this project.
Interfacing: One piece of medium-weight fusible interfacing cut to the same size as your outer fabric gives the case body and structure. This is especially important if your outer fabric is on the lighter side.
Ribbon or cotton twill tape: You’ll need about 40 to 50 inches of ribbon, twill tape, or a strip of fabric cut on the straight grain for the tie closure. A half-inch to three-quarter-inch width looks tidy and ties well.
Thread: Match your thread to your outer fabric or go with a contrasting color if you want your topstitching to be a visible design element.
Basic sewing supplies: Scissors or a rotary cutter, a cutting mat, a quilting ruler, pins or clips, an iron and ironing board, and a sewing machine. A walking foot is helpful but not required.
Understanding the Measurements
The measurements below produce a case that holds straight needles up to about 14 inches long and has a pocket panel sized for circulars or double-pointed needle sets. Feel free to adjust based on your own collection.
The main body panel is cut at 15 inches wide by 18 inches tall. This is the piece that becomes the outer layer of your finished roll.
The lining is cut to the same dimensions: 15 inches wide by 18 inches tall.
The pocket panel is cut at 15 inches wide by 9 inches tall. This piece, once folded and attached to the lining, creates the pockets where your needles sit.
If you want to store longer straight needles (some go up to 16 or even 18 inches), increase the height of your main body panel accordingly. Similarly, if you have a large collection and want more pocket space, you can add a second pocket panel or make the existing one taller.
Step-by-Step Instructions
Step One: Prepare Your Fabric
Begin by prewashing and pressing all of your fabrics. This is an easy step to skip, but it’s worth doing because it prevents your finished case from shrinking or puckering the first time it gets a bit damp. Press everything flat before cutting.
Apply your fusible interfacing to the wrong side of your outer fabric piece following the manufacturer’s instructions. Use a pressing cloth if your interfacing tends to bleed through. Let the piece cool completely before moving on.
Step Two: Prepare the Pocket Panel
Take your pocket panel piece and fold it in half lengthwise, wrong sides together, so you end up with a piece that is 15 inches wide and about 4.5 inches tall. Press this fold well. This folded edge will become the top finished edge of your pocket section, which means you don’t need to hem it separately.
Topstitch along the folded edge about an eighth of an inch from the fold. This stitching is structural as much as decorative — it keeps the fold crisp and gives the pocket panel a clean, professional finish.
Step Three: Attach the Pocket Panel to the Lining
Lay your lining piece flat with the right side facing up. Align the raw edges of your pocket panel with the bottom raw edge of the lining piece, with the folded and topstitched edge of the pocket panel pointing upward. The pocket panel should sit right side up, and both raw bottom edges should be flush. Pin or clip in place.
Baste the pocket panel to the lining along the bottom and both side edges using a quarter-inch seam. This holds everything in place while you create the individual pockets.
Now decide how you want to divide your pockets. For a basic straight-needle case, channels of about one inch wide work well for individual needles, while slightly wider channels of one and a half to two inches accommodate sets of double-pointed needles or interchangeable tips. Use a fabric marker or chalk to mark your channel lines from the top folded edge of the pocket panel down to the basted bottom edge.
Stitch along each marked line with a straight stitch, backstitching at the top of each channel to reinforce it. These are the seams that will take the most stress as you slide needles in and out, so a little extra reinforcement here goes a long way.
Step Four: Attach the Ribbon Tie
Cut your ribbon or twill tape in half so you have two pieces of equal length. Fold each piece in half to find the center, and pin each one to the right side of your outer fabric piece, centered on each long side edge (so one tie on the left side and one on the right), with the folded center of the tie aligned with the raw edge of the fabric. The ribbon should be pointing inward toward the center of the fabric at this point, which means it will flip outward when the case is turned right side out.
Baste the ties in place with a short seam right at the edge.
Step Five: Join Outer Fabric and Lining
Place your outer fabric and lining right sides together, with the pocket panel sandwiched between them. The ties should be tucked inside between the two layers. Pin or clip all the way around the edges.
Stitch around the entire perimeter using a half-inch seam allowance, leaving a gap of about four inches along one of the short edges for turning. When you reach the corners, sew a couple of stitches diagonally across them instead of pivoting right at the point — this reduces bulk and gives you nicer corners when you turn the piece right side out.
Trim the corners diagonally, being careful not to cut through your stitching. This step makes a visible difference in how sharp and neat your finished corners look.
Step Six: Turn, Press, and Topstitch
Turn the case right side out through the gap you left. Use a blunt tool like a knitting needle (appropriate, given the context) or a chopstick to gently push out the corners. Press the entire case well, turning in the raw edges of the gap so they’re flush with the seam.
Topstitch all the way around the perimeter of the case, about an eighth of an inch from the edge. This closes the turning gap, flattens everything beautifully, and gives the case a finished, intentional look. If you’re using a contrasting thread, this is where it makes its statement.
Step Seven: Final Pressing
Give the finished case a thorough press on both sides. A well-pressed piece looks far more polished than one that goes without this final step, and the heat helps set the topstitching so it lies smooth and flat.
How to Use Your Knitting Needle Case
To load the case, slide each needle (or set of needles) into its own channel from the top opening. Single straight needles go point-down into the pocket, with the knob end sticking up above the folded edge so you can easily grab them. Circular needles can be coiled and tucked into a wider channel. Double-pointed needle sets slide in as a group.
To close the case, lay it flat and roll it from one side to the other. The pockets keep the needles in place as you roll, and once you’ve rolled the whole thing into a tidy bundle, wrap one tie around it in one direction, bring the other tie around from the opposite side, and tie them together in a bow. The result is a compact, secure roll that tucks into a project bag or a suitcase without losing a single needle.
Customization Ideas
One of the real pleasures of making your own needle case is that you can modify the pattern in dozens of ways. Here are some ideas to get you thinking.
Add a small zippered or button pouch to the bottom of the lining before you assemble the case. This is a perfect spot for stitch markers, a small tape measure, yarn needles, and other notions that tend to disappear at the bottom of a project bag.
Use a fat quarter bundle as your fabric source. Fat quarters from a coordinating bundle make it easy to mix prints for the outer fabric and lining without worrying about whether they’ll work together — the fabric designers have already done that work for you.
Adjust the pocket heights for a specialty case. If you mostly use short straights and double-pointed needles, you can shorten the entire case considerably. If you primarily use long circulars stored in their original packaging, you might make the pocket panel taller to accommodate them standing upright.
Make a mini version to hold just your most-used needles when you travel. A case that’s eight or nine inches wide rolls up to the size of a small scroll and tucks into a purse or carry-on easily.
Try a snap or magnetic closure instead of ribbon ties. A pair of sew-on snaps along the rolled edge keeps the case closed without needing to tie a bow, which some people find more convenient on the go.
Quilt the outer panel before assembly for extra texture and dimension. Even a simple diagonal grid quilted across the outer fabric gives the case a lovely handmade quality and adds a bit more structure.
Tips for a Polished Finish
Press at every step. The single biggest difference between a case that looks homemade and one that looks handmade is pressing. Press your seams, press your folds, press your panels, and press the finished piece one more time at the end.
Slow down at the corners. Corners are where most of the trouble happens. Take your time, trim the excess carefully, and use your turning tool gently so you don’t poke through the fabric.
Use good quality ribbon. Cheap ribbon that frays, stretches, or becomes limp after a few uses will drag down the whole project. A cotton twill tape or a grosgrain ribbon holds up well and ties into a reliable bow.
Test your pocket widths before you stitch them all. Slide a needle into the channel width you’re planning before you sew the remaining channels. It’s much easier to adjust the spacing at this point than to unpick finished seams.
A Project Worth Making
A handmade knitting needle case is one of those objects that earns its place in your crafting life immediately. It imposes order on a collection that tends toward chaos, it makes traveling with your tools easier and more pleasant, and it gives you a small opportunity to express your own aesthetic in a functional object. Because the construction is genuinely straightforward, it’s also one of those rare projects where the effort invested is minimal and the reward is disproportionately large.
Whether you’re making this for yourself or as a gift, take your time choosing fabrics that genuinely delight you. You’ll look at this case every time you knit, and that’s reason enough to make it beautiful.


