


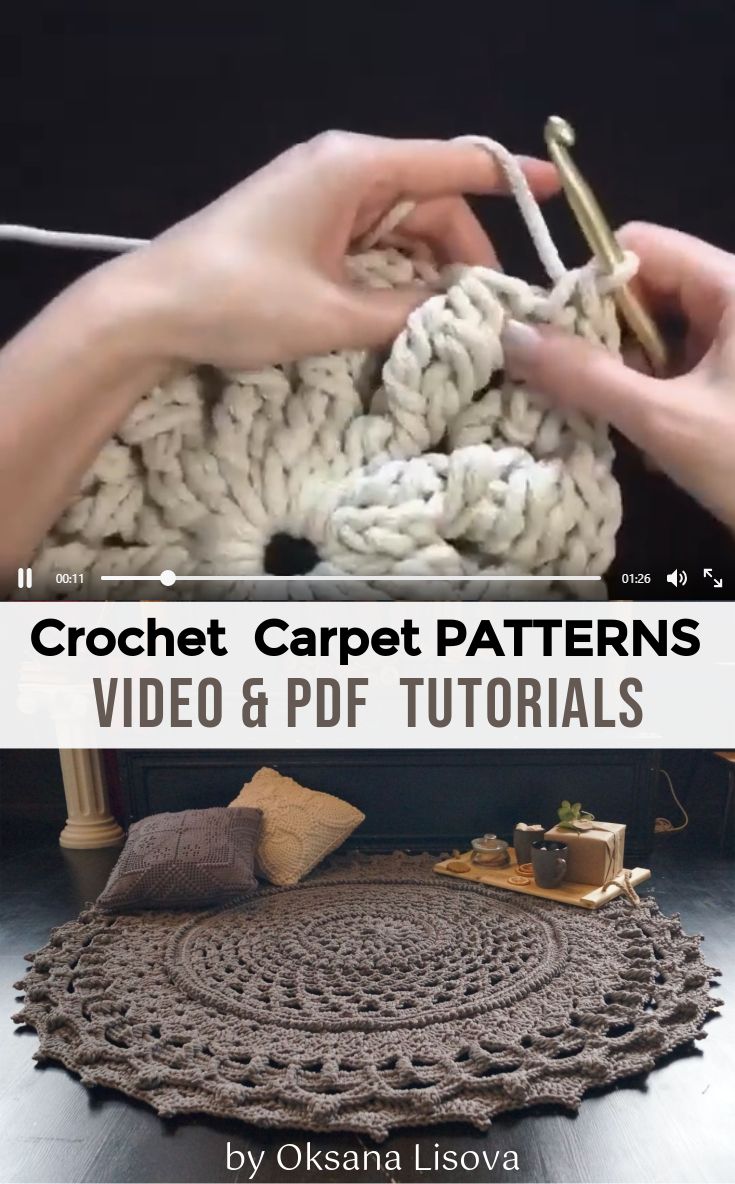
Crochet Floor Rug — Video & PDF Tutorials: See All Carpet Patterns
There is something deeply satisfying about placing a handmade rug on the floor and knowing that every loop, every stitch, every color choice came from your own two hands. Crochet floor rugs have been a beloved home décor project for generations, and right now they are having a serious renaissance among crafters of all skill levels. Whether you are a complete beginner picking up a hook for the first time or an experienced maker looking to challenge yourself with intricate carpet patterns, the world of crochet rugs has something extraordinary waiting for you.
This guide will walk you through everything you need to know — from choosing the right materials and understanding essential stitch techniques to exploring the most popular carpet patterns available as both video tutorials and downloadable PDF guides. By the end, you will have all the tools and inspiration you need to start (or finish) your next floor rug project with confidence.
Why Crochet Floor Rugs Are Worth Making
Before we dive into the patterns themselves, let us talk about why crochet rugs are such a rewarding project. Unlike wall hangings or accessories, a floor rug is functional art. It lives in your home every single day. It greets you when you step out of bed in the morning, cushions your feet in the kitchen while you cook, and anchors your living room furniture with color and texture that no store-bought rug can quite replicate.
There is also the matter of customization. When you crochet your own rug, you choose the size, the shape, the color palette, and the stitch pattern. You can make a small bathroom mat to match your towels or a large area rug that becomes the focal point of an entire room. You can keep it neutral and minimalist, or go bold with stripes, mandalas, or geometric shapes. The creative freedom is genuinely unlimited.
From a practical standpoint, handmade rugs also tend to be more durable than mass-produced alternatives when made with the right materials. A tightly worked rug in cotton or jute rope can outlast several store-bought versions and can be repaired or even unraveled and remade if needed. That kind of longevity and sustainability is increasingly appealing to crafters who want their hobbies to align with thoughtful, slow-living values.
Choosing the Right Materials for a Crochet Rug
The material you choose will define everything about your finished rug — its texture, durability, washability, and overall appearance. Getting this decision right before you start will save you a lot of frustration later.
Cotton rope and cotton yarn are among the most popular choices for beginners and experienced makers alike. Cotton is easy to work with, comes in an enormous range of colors, holds its shape well, and is typically machine washable, which makes it ideal for high-traffic areas like kitchens and bathrooms. T-shirt yarn, also known as fabric yarn or zpagetti yarn, is a recycled cotton option that creates a wonderfully chunky, squashy rug with a soft feel underfoot.
Jute and sisal are natural fiber options that bring a more organic, earthy look to your rug. These materials are stiffer than cotton and not as comfortable barefoot, but they are extremely durable and have a beautiful natural texture that works especially well in entryways, under furniture, or in spaces with a boho or coastal aesthetic. Keep in mind that jute and sisal are not typically washable, so they work best in lower-traffic or decorative settings.
Wool is another gorgeous option, particularly for rugs in colder climates. Wool rugs have natural warmth, slight elasticity, and a rich depth of color when dyed. They do require more care than cotton, and pure wool can be prone to felting if washed incorrectly, but many crafters love the tactile luxury of a wool rug.
For those who want to work with large hooks and get results quickly, chunky or bulky weight yarns in cotton or acrylic blends are a great choice. Using a 10mm, 12mm, or even 15mm hook with thick yarn lets you complete a decent-sized rug in a weekend, which is incredibly motivating.
Essential Tools and Hook Sizes
Your hook size should match your yarn weight. For chunky rope or fabric yarn, hooks in the 10mm to 15mm range are standard. For medium weight cotton yarn, a 5mm to 7mm hook is typically appropriate. For finer yarn used in more detailed decorative rugs, you might go as small as 3.5mm or 4mm.
Beyond your hook and yarn, you will want a yarn needle or tapestry needle for weaving in ends, scissors, and a tape measure or ruler for checking your dimensions as you go. A non-slip rug pad placed underneath your finished rug is also highly recommended — it protects your floors, keeps the rug in place, and extends the life of your creation.
Understanding the Core Stitches Used in Rug Patterns
Most crochet rug patterns use a relatively small set of stitches, which is great news if you are a beginner. Here is a quick breakdown of the stitches you will encounter most frequently.
The chain stitch is used to begin almost every flat rug project. It forms the foundation row that you then build your rug upon. The slip stitch is used to join rounds when working in the round, which is the method used for circular and oval rugs. The single crochet stitch is the backbone of the majority of rug patterns. It creates a dense, tight fabric that holds up well underfoot. The half double crochet and double crochet stitches create a slightly more open, faster-growing fabric and are often used in patterns where you want some loft or texture. The magic ring, also called a magic circle or magic loop, is the technique used to begin circular rugs without leaving a hole in the center.
For more decorative patterns, you may also encounter the slip stitch herringbone, the moss stitch or linen stitch, the spike stitch, and various forms of tapestry crochet where you carry multiple colors to create patterns within the fabric itself. All of these are covered in both the video and PDF tutorials available in this collection.
Beginner Crochet Rug Patterns
If you are just starting out, the best rug patterns to begin with are those that use a single stitch worked in continuous rounds or simple rows. Here are some of the most popular beginner-friendly options in this collection.
The classic round rug is worked from the center outward using single crochet stitches in the round. You begin with a magic ring, increase steadily each round, and can make it as small as a bathroom coaster or as large as a living room area rug. The pattern is forgiving, easy to memorize after the first few rounds, and can be made in a single color or alternated every round for a striped effect. Both a step-by-step video tutorial and a written PDF pattern with stitch counts for multiple sizes are available.
The simple striped rectangular rug is worked in rows of single crochet and is a fantastic first project because it teaches you the basic mechanics of turning your work, counting stitches, and changing colors. You can make it as long or as short as you like, and color changes are as easy as joining a new yarn at the end of a row. The video tutorial walks you through every step from foundation chain to finishing, and the PDF includes a color combination guide for inspiration.
The oval rug is a variation on the round rug and is particularly popular for bathroom and kitchen use. It is worked similarly to a round rug but with a chain at the center rather than a magic ring, and stitches are worked around both sides of the chain to create the elongated oval shape. This one is especially well-explained in the video tutorial, where you can see exactly how to manage the increases at each end without puckering.
Intermediate Crochet Carpet Patterns
Once you are comfortable with the basics, there is a whole world of more interesting textures and constructions to explore. These patterns typically involve color changes, multiple stitch types, or slightly more complex shaping, but they are all very achievable with a bit of patience.
The herringbone stitch rug is a perennial favorite. The herringbone effect is created by working a modified single crochet that pulls through the back loop of the previous stitch, creating a woven, almost braided texture across the surface of the rug. It looks incredibly sophisticated but is surprisingly easy once you get the hang of the modified stitch motion. The video tutorial for this pattern is particularly helpful because seeing the stitch worked in real time makes the technique click much faster than reading about it. The PDF includes both the stitch explanation and a full pattern for a 24-inch round rug.
The striped mandala rug combines the construction of a classic round rug with carefully timed color changes to create a mandala-like striped effect that radiates from the center. By changing colors at specific round intervals and using a consistent yarn carrier technique to avoid too many ends to weave in, you can achieve a beautiful gradient or rainbow effect. This pattern comes with a full color chart in the PDF and a video that demonstrates both the color change technique and how to keep your tension consistent across the full width of a large rug.
The spike stitch rug introduces a lovely raised texture by working stitches that dip down into lower rows, pulling long loops of yarn up through the fabric. The result looks almost like woven fabric and creates a beautiful ribbed or geometric texture depending on how the spikes are arranged. This is a great pattern for someone who has mastered basic stitches and wants to try something new without committing to a complex colorwork pattern.
Tapestry crochet rugs are where things start to get really exciting. Using two or more colors per row and carrying the unused color inside your stitches, you can create pictorial patterns, geometric shapes, or complex repeating motifs that look almost like a woven carpet. Diamond patterns, chevrons, tribal-inspired motifs, and even simple floral repeats are all achievable with tapestry crochet technique. The PDF patterns in this collection for tapestry rugs include full stitch charts as well as written row-by-row instructions, and the video tutorials break the colorwork technique down into very manageable steps.
Advanced Crochet Rug Patterns
For experienced crocheters who want a true challenge, the advanced patterns in this collection push the possibilities of the craft in exciting directions.
The freeform crochet rug invites you to let go of a fixed pattern entirely and work intuitively, joining different motifs, textures, and stitch samples into a cohesive whole. This style of rug-making is perfect for using up stash yarn and is as much an art project as a craft project. The PDF guide for freeform crochet provides principles and suggested stitch combinations rather than a row-by-row pattern, and the video tutorial walks through how to plan a freeform rug, how to join sections seamlessly, and how to create visual balance across the piece.
The intricate star motif rug is worked in rounds and uses a combination of double crochet clusters, chain spaces, and slip stitches to build a large, lacy star at the center with a dense border all around it. It is a genuinely beautiful piece when finished and works best in a single color or two complementary shades that let the stitch detail shine. The PDF for this pattern is quite detailed and includes a stitch diagram in addition to the written pattern.
The braided or Tunisian crochet rug uses the Tunisian simple stitch worked with a long Tunisian hook and then seamed or assembled into a rug panel. Tunisian crochet creates a dense, almost fabric-like textile with a beautiful right-angle structure, and rugs made in this technique have a smooth, tailored surface that is very different from traditional crochet rugs. The video tutorial covers how to work Tunisian simple stitch, how to manage the hook and yarn together, and how to seam multiple panels into a large rug.
How to Use the Video and PDF Tutorials
Every pattern in this collection is available in both video and PDF format, and many crafters find it helpful to use both together. The video tutorials are ideal for understanding tricky techniques — you can see exactly how the hook moves, how the yarn is held, and how a stitch forms in real time. You can pause, rewind, and replay at any point, which is particularly useful for techniques like the magic ring, colorwork carries, or Tunisian crochet that are hard to fully grasp from written descriptions alone.
The PDF tutorials are perfect for working alongside your project. Once you have watched the video and understand the technique, you can print the PDF or pull it up on a tablet and follow along row by row without needing to scrub through a video. PDF patterns in this collection are designed with clear formatting, stitch counts for multiple sizes, and notes about yarn substitutions and gauge.
For absolute beginners, the recommendation is to watch the full video tutorial before picking up your hook, then work through the pattern with the PDF open in front of you. For those returning to a project after a break, the PDF is usually the faster reference for getting back to the right row or round.
Tips for Getting Great Results
A few practical tips will make a big difference in the quality and longevity of your finished rug. Always check your gauge before beginning a large project. Even a small difference in tension across a swatch can translate to a significantly different finished size in a large rug. The PDF patterns in this collection include gauge information for each pattern, and there is a short video guide to gauge checking in the beginner resources section.
Work your stitches firmly but not so tightly that the fabric becomes rigid or hard to work into. Rug fabric should be dense but still have some flexibility. If you find your stitches are very tight and your hook is hard to insert, try going up one hook size.
Weave in your ends securely, especially in a rug that will see regular foot traffic. Use a tapestry needle to weave each end through at least five or six stitches in alternating directions before trimming. For extra security, particularly with slippery synthetic yarns, a small drop of fabric glue on the woven end can prevent it from working loose over time.
Blocking your finished rug can make a huge difference to how flat and even it lies. Wet blocking — soaking the finished rug in cool water, gently pressing out the excess, and pinning it flat to dry — works well for natural fibers. For synthetic yarns, steam blocking with a damp cloth and iron (never iron directly on acrylic yarn) can smooth out any curling edges.
Caring for Your Crochet Rug
How you care for your rug will depend on the fiber content. Cotton rugs can typically be machine washed on a gentle cycle with cold water and laid flat to dry. Avoid putting them in the dryer on high heat, as this can cause shrinkage and distortion. Wool rugs should be hand washed or dry cleaned depending on the specific fiber and construction. Jute and sisal rugs should not be wet at all — spot clean with a dry brush or barely damp cloth only.
Regular shaking or vacuuming on a low suction setting will keep your rug looking fresh between washes. If a rug starts to curl at the edges, re-blocking it or placing something heavy around the perimeter overnight can often resolve the issue without needing a full wash.
Final Thoughts: Start Your Crochet Rug Project Today
There has never been a better time to explore crochet floor rugs. The range of available patterns — from beginner-friendly basics to advanced showstopper pieces — means that every level of maker can find something worth creating. With full video tutorials to guide you through techniques visually and detailed PDF patterns to follow at your own pace, the entire process is accessible, well-supported, and genuinely enjoyable.
Browse through all the carpet patterns in this collection, pick the one that makes your heart race a little, gather your materials, and start. Your floors are waiting for something beautiful, and you are exactly the person to make it.


